Sunday School-Banana Nut Brunch Bundt

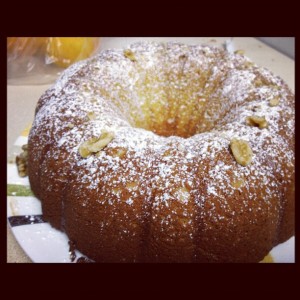
Banana nut brunch bundt, trying saying that three times fast!

The great news about this cake is that it’s practically dessert but the bananas make it totally ok for brunch, which means you’re a winner!

The cake is dense, flavorful and moist.  It’s so yummy with some scrambled eggs, some fruit salad, and it’s pretty easy!  You could definitely make it the night before and take it to brunch, super fancy style!

Love brunch, wish I could have it ever Sunday 🙂

Banana Nut Bundt

adapted from Taste of Home

1/3 cup butter

1 1/4 cups sugar

2 eggs

vanilla

2 large mashed bananas

2 cups flour

1 1/4 teaspoons baking powder

1 teaspoon baking soda

salt

1 cup sour cream

chopped walnuts

powdered sugar

Preheat oven to 350.  Grease a bundt pan, extra well!  I always freak out about it, so I use a lot of spray.

In a large bowl add the butter and sugar.  Cream with a mixer together until lighter in color and slightly fluffy.  Mix in the mashed bananas.

Add the eggs and vanilla to the butter mixture and mix well.

In a medium bowl mix together the flour, baking powder, baking soda and salt

Add 1/3 of the flour to the butter mixture and mix until incorporated.  Add 1/2 of the sour cream.  Add another 1/3 of the flour, then the last half of the sour cream and finally, the last 1/3 of the flour.

Scrape the sides of the bowl and then mix in the chopped walnuts.

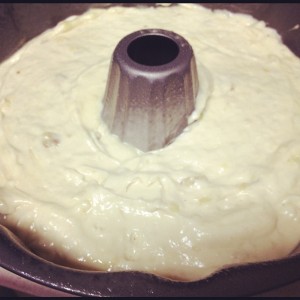
Pour the batter into the greased pan.

Bake for 45-50 minutes or until a toothpick comes out clean.

Remove the cake from the oven and turn upside down on a cooling rack.  Allow to cool for 10 minutes.

When the cake is removed from the pan dust with powdered sugar and sprinkle some more chopped nuts on top.

Enjoy, my loves!

Love,

Keely


Sunday School-Crepe Cake

It’s Sunday!  Today is a day to sleep in (or go to church, but that is the beauty of my church meeting on Tuesday nights, I still get to sleep in on Sunday) have brunch, play outside, do some shopping, make a big dinner and have dessert.

It’s the dessert part (and I guess if you stretch it the brunch part) that I’m aiming at here.

Sunday’s are my favorite days.  I never really realized that until I started going to my Tuesday night church but it’s such a great day!  I love to get creative on Sundays, spend time with people on Sundays

Have you ever heard of a crepe cake?  Well I saw some on Pinterest and it seemed easy enough so I decided to just go for it.  You just need crepes, and filling of choice (I used ganache, Nutella and salted caramel).  Here’s what it looked like.

Ah, drippy, salted caramel.  I love you, oh so much!

Making crepes is way easier than people claim.  All you need is a pan and some butter and a batter, easy as pie (actually far EASIER than pie).

Simple, wonderful layers.

We’re going to start with the ganache, and then the caramel, cause that’s really the order things need to be done in.

Chocolate Ganache

3/4 cups chocolate chips

1/2 cup heavy cream

vanilla

Set up a double boiler and add in your chocolate chips and heavy cream.

Cook over medium heat and stir frequently until the chocolate is mostly melted.  When there are just a few chocolate chunks left, remove from the heat and continue to stir until completely smooth.  Add the vanilla.  Set aside and allow to cool.

Salted Caramel Sauce

1 cup sugar

1/2 teaspoon salt

1/2 cup water

1 tablespoon light corn syrup

1/2 cup room temperature heavy cream

vanilla

In a medium sauce pan briefly stir together the sugar, salt, water and corn syrup.  Bring to a boil over medium high heat.  Allow to boil for 8-10 minutes or until the liquid turns an amber color.  Keep an eye on this, you do not want it burn!

As soon as it turns a dark amber, remove from the heat.  Slowly add the room temperature cream, stirring constantly.  It will boil up, just keep stirring.

Once the mixture has come together, add a dash of vanilla and allow to cool.

Simple Crepes

adapted from She Knows

2 cup flour

4 eggs

1 cup water

1 cup milk

salt

2 teaspoons vanilla

1/4 cup melted butter

In a large bowl mix together all liquid ingredients (this everything but the flour).  Whisk together until the eggs are well incorporated.

Slowly add the flour and whisk until well incorporated.

(See that was easy).

Spray your non-stick pan and pre-heat it over medium-high heat.

Use a 1/4 cup measuring cup to scoop out the batter into the middle of the pan.  Swirl the pan around to spread out the crepe.  Allow to cook until the edges barely turn brown.

Use your thinnest spatula (or your awesome flipping talents…it’s all in the wrist) to flip to the other side and cook for another minute or so.

Slide out of the pan and onto a plate.

This is where the fun starts.

To be totally honest the easiest way to build this is to do it while the crepes are cooking (finish one crepe, layer with ganache while another one is cooking, so on and so forth).  So let’s do that.

Take that first crepe and spread some ganache on it.  Now keep cooking crepe number 2.  Slide that on top, spread on ganache (or caramel, or Nutella, you can decide on the ratios).  Nice work, just keep stacking!

Congrats you did it!  Now pour any left over caramel all over the top of that.  Nice work, add some extra sea salt for good measure and hazelnut whipped cream if you’re feeling super adventurous.

Wow that looks amazing.  You enjoy that! You earned it!

Love,

Keely

Sunday School-Sugar Free Roasted Strawberry Buttermilk Cake

Wow, that is one long title for a cake, but it’s going to be delicious.  And by sugar-free I do not mean that this is packed full of fake sweetener, nor do I mean that this is particularly healthy, there is still some butter and buttermilk in it (you could make it lighter by using non-fat buttermilk.)

So instead of refined sugar I used agave.  This created a much less-sweet cake, but that’s ok because the strawberries really shine through which makes it amazing!

And let’s talk about the roasted strawberries.  Roasting them caramelizes their sugars and makes them so sweet and delicious, adding salt just makes them taste more like strawberries, it’s amazing!

And look at how delicious those strawberries make the top of this cake look!

Are you hungry yet?

Ok good, let’s get going on this!

Roasted Strawberries

adapted from Joy the Baker

1 carton strawberries cut into halves or quarters (you can use more if you would like)

1 tablespoon butter

2 tablespoons real maple syrup

1 tablespoon olive oil

1 teaspoon sea salt

Preheat the oven to 400.

While you are slicing your strawberries, put a pat of butter on a edged cookie sheet (edges are super important!  If you don’t have a cookie sheet with edges you can use a pyrex) and put in the oven until melted.

Swirl the melted butter around the pan and pour the sliced strawberries on top of it.

Drizzle with maple syrup and olive oil and sprinkle some salt all over those strawberries.

Now mix everything together, it’s looking yummy!

Throw that pan in the oven for 20-30 minutes or until the strawberries are nice and tender and their juices have formed a syrup.

Buttermilk Cake

adapted from Joy the Baker

2 1/2 cups flour

1 tablespoon baking powder

1/3 cup pure agave

salt

2 eggs

1 1/2 cups buttermilk

1/4 cup butter, melted

vanilla

Roasted strawberries

So while your strawberries are roasting you can go ahead and get this together, it’s pretty simple and all you need is a bowl and a whisk!

Preheat oven to 400.

In a large bowl mix together all your liquid ingredients (agave, eggs, buttermilk, butter, vanilla).  Give them a quick whisk and make sure that everything is incorporated.

Then add in the flour and the baking powder.  Whisk until smooth (don’t over whisk, it’s ok if the batter is mostly smooth with a few chunks).

Butter and flour a pie pan, this will prevent the cake from sticking.

Scoop the cake in, all of it may not fit, you can make it into a cupcake or two if you feel like it.  Smooth out the top a little bit.

This is where this cake gets taken up a notch, it’s about to get exciting.  Take your strawberries and spread them evenly over the cake, adding some of the syrup as well.

Throw that puppy in the oven for 25-30 minutes or until nice and golden brown and firm.

Allow to cool and slice and serve, everyone will be so impressed with your skills (especially since the name makes it sound so fancy!).

Also, for the record, this cake was so easy that I was able to make it with this much counter space.

I had just moved and that’s about all I could clear off at the time, so no excuses, just go and bake and love it!

Love,

Keely

Weekly Wrap Up

This week was so lovely!  The weekend was so busy and full of such great community!

I headed down to my city’s “First Friday” at one of the art districts, there was a Cinco De Mayo party, cupcakes to be made for my pastor’s son’s 13th birthday, brunch to attend and that was just the weekend!

Again, it is always so fun for me to look back at the pictures that I have taken and posted to Instagram in a week to remind myself of everything that happened!

On Friday my co-workers and I headed to Noodles and Company for what ended up being a LONG lunch, the drink machine was amazing!

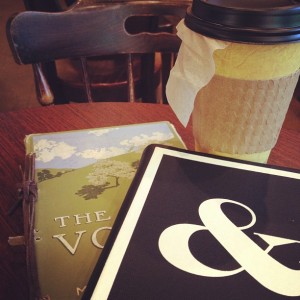
I spent a bit of time on my own before heading down to first Friday.  I armed myself with my journal, my nook and a nice cup of tea.

Livin’ in a hipsters paradise.  My friend and I had so much fun hanging out at First Friday, we know we’ll be going back in June!  We saw an amazing wall of doors, we ate from a delicious food truck and we saw Brazilian Martial Arts Dancing (then we left the art district and got ourselves some ice cream, who can say no to ice cream made with beer?)

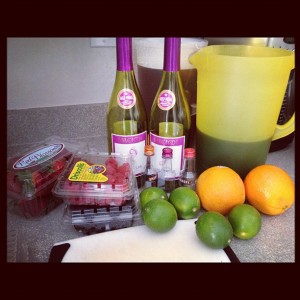
Every good Cinco de Mayo party calls for some sangria, right?  Ok, well maybe not but I made some any (recipe coming in June).  I kind of love sangria 🙂

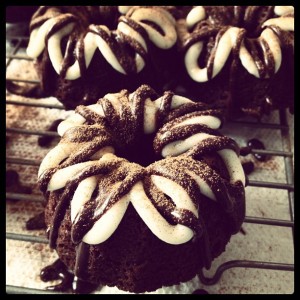
To make up for the non-Mexican-ness of my sangria I showed up at the party with a platter of these guys, Mexican chocolate mini-bundts!  Mini-bundts are my new favorite thing, they’re so adorable and tiny!  I’m still working on getting the frosting situation just right but I’m always up for a challenge.

Real-life baking.  I always make a huge mess and then have to tote everything around in unattractive carriers from place to place in my car (the box of cupcakes were for my pastor’s son’s birthday…Mexican chocolate cupcakes and vanilla with salted caramel buttercream cupcakes…yum!)

This was a total hit at the brunch I attended!  We settled on a “Mexican” theme due to Cinco de Mayo and so I made a tres leches baked French toast with a banana caramel sauce.  I was worried it would be too sweet but it was just right! (Recipe coming in June!)

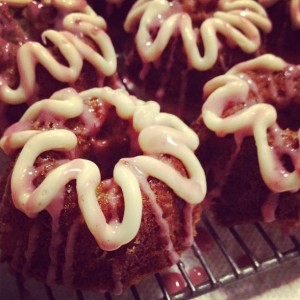
When I don’t go to the grocery store I force myself to be creative.  I was going to make orange bundts with some sort of raspberry topping, but I didn’t have any sour cream so I subbed in apple sauce.  I ended up with an apple orange mini-bundt with brown sugar cream cheese frosting and raspberry orange glaze.   I heard good things about them 🙂

More solo time, me, a park bench, a cup of iced coffee and my nook (not pictured).

My church is unique.  We meet on Tuesday nights and we meet at a concert venue.  This week I was on “bartender” duty (no alcohol was served) which meant that I was behind the bar for the worship portion of the night.  Ever sang worship from behind a bar, give it a try some time 🙂

Mini golf!  I took the girl that I mentor mini golfing, she had never been before.  It was so fun to watch her get so excited about the little dorky things that us adults are so jaded by.

A “beauty” shot of the completed sangria, posted a few days later.  Wish I was drinking some right now.  (Again I REALLY love sangria!)

Well there you have it.  Another week down and another look behind the scenes of my “glamorous” life.

Love,

Keely